
Oavsett om du sätter upp en direktsändning, hanterar digital skyltning eller distribuerar video i ett företagsnätverk har du förmodligen insett att det inte räcker med att dra HDMI-kablar genom en byggnad. Kablarna blir snabbt för korta, och att sätta upp en egen dator för varje videoflöde är en säker väg till programvarukrascher och sprängda budgetar.
Det är just här som en HDMI IPTV-kodare kliver in.
I stället för att förlita sig på klumpiga inspelningskort och bräckliga programvarulösningar tar en kodare emot din råvideo och sköter det tunga arbetet i en kompakt, specialiserad hårdvaruenhet. Låt oss gå igenom exakt vad dessa enheter gör, varför de ersätter traditionella streamingdatorer och vilka specifikationer som faktiskt är viktiga när du ska köpa en.
Vad är en HDMI-IPTV-kodare?
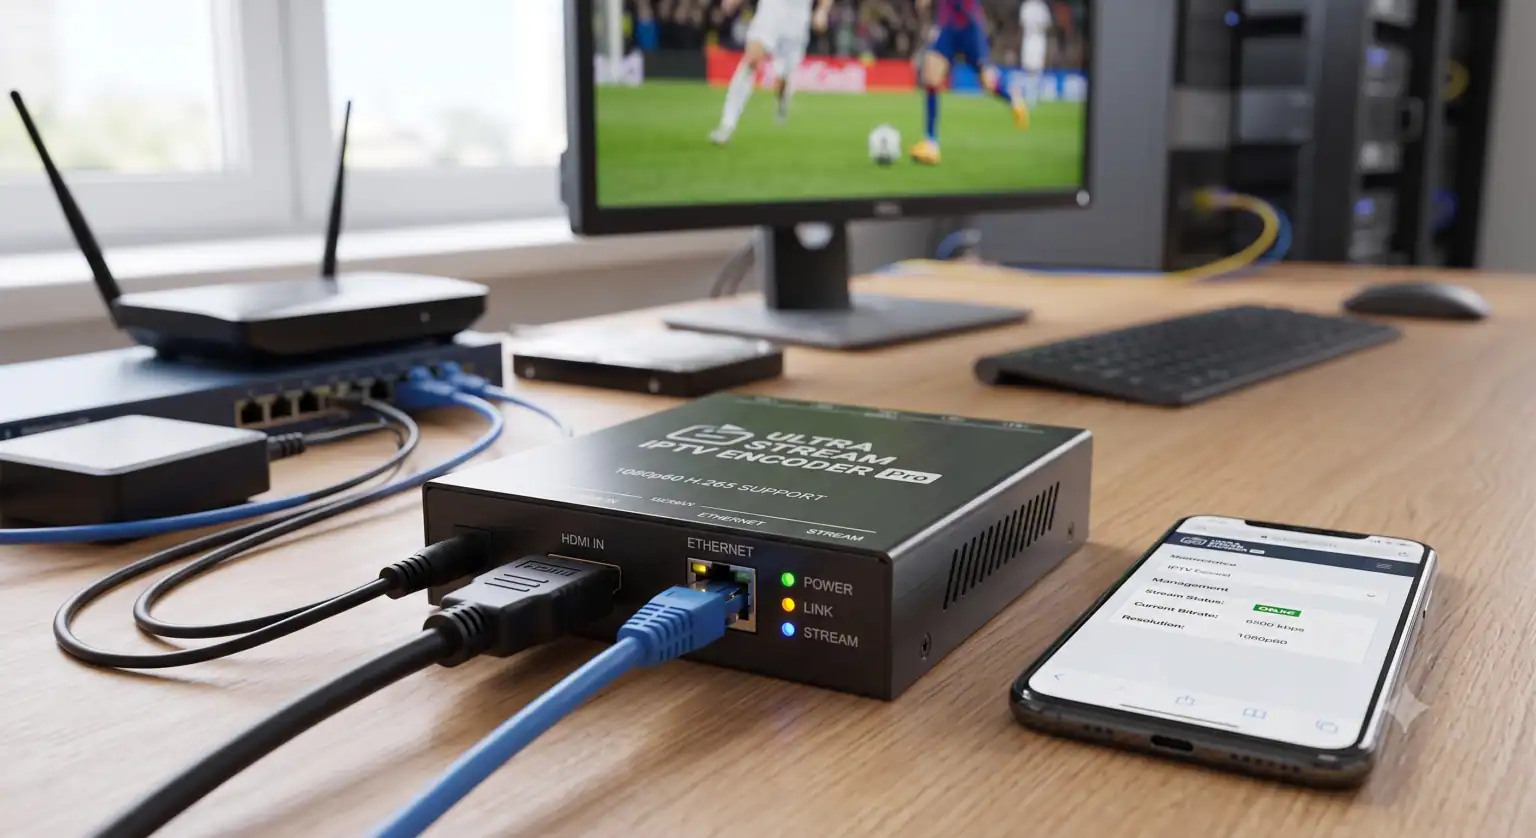
I grund och botten är en HDMI-IPTV-kodare en hårdvarubro mellan en fysisk videokälla och ett IP-nätverk.
Du ansluter en videosignal (från en kamera, bärbar dator eller digitalbox) till HDMI-ingången. Enkoderns interna processor hämtar den okomprimerade videon och komprimerar den med hjälp av en mycket effektiv kodek (vanligtvis H.264 eller H.265) och paketerar den till en dataström. Dessa data skickas sedan via en Ethernet- eller Wi-Fi-anslutning direkt till internet, ett lokalt nätverk eller en specifik streamingplattform som YouTube, Twitch eller din egen IPTV-server.
Tänk på det som en översättare som talar “kamera” på ena sidan och “internet” på den andra, utan att det behövs någon dator emellan.
Hårdvarukodning kontra mjukvarukodning: Varför byta?
Om du redan har OBS Studio igång på en bärbar dator kanske du undrar varför du behöver lägga ut några hundra dollar på en dedikerad hårdvarukodare. Svaret kan sammanfattas i ett enda ord: Tillförlitlighet.
Programvarukodningen är helt beroende av datorns processor och operativsystem. Om Windows börjar köra en uppdatering i bakgrunden, eller om kylfläkten har svårt att hänga med en varm dag, kommer din sändning att tappa bildrutor eller krascha helt.
Hårdvarukodare som Teradek Vidiu X, Kiloview P3 eller till och med prisvärda alternativ från Gofanco och Orivision är specialutvecklade för en enda uppgift. De har inga överbelastade operativsystem. De kan vara igång dygnet runt i ett serverrack eller monterade på ett kamerastativ och sända en stabil ström i flera dagar i sträck utan minsta problem.
De viktigaste specifikationerna (och vad de egentligen betyder)
När man läser igenom tekniska specifikationer kan all fackterminologi kännas överväldigande. Här är vad du faktiskt behöver titta efter när du väljer en kodare:
1. H.264 jämfört med H.265 (HEVC)
Detta är den komprimeringsstandard som kodaren använder.
H.264 är branschstandarden. Den fungerar med nästan alla uppspelningsenheter och streamingplattformar i världen.
H.265 (High-Efficiency Video Coding) är den nyare och smartare versionen. Den kan leverera exakt samma videokvalitet som H.264 samtidigt som den använder ungefär hälften så mycket bandbredd. Om du sänder i 4K, eller om du streamar från en plats med usla uppladdningshastigheter, är en kodare som stöder H.265 en enorm livräddare.
2. Stödda strömningsprotokoll
Olika destinationer kräver olika leveranssätt.
RTMP (Real-Time Messaging Protocol): Den gamla, beprövade standarden som används av YouTube, Facebook Live och Twitch.
SRT (Secure Reliable Transport): Det moderna valet för proffs inom tv- och radiobranschen. Den hanterar paketförluster på ett utmärkt sätt, vilket gör den perfekt för streaming över opålitliga mobil- eller Wi-Fi-nätverk.
HLS och multicast: Oumbärligt om du distribuerar video internt, till exempel när du sänder en direktsändning till 50 smart-tv-apparater på ett hotell eller ett universitetsområde.
3. Fördröjning
Om du streamar en Sport Om evenemanget sänds till en lokal extra sal, vill man inte att publiken ska jubla fem sekunder efter att ett mål har gjorts. Avancerade kodare har en fördröjning på så lite som 100 millisekunder, vilket ger en sändning i nästan realtid.
4. Nätverkssammanlänkning
För fjärrinstallationer där det inte går att ansluta till en fast Ethernet-port bör du välja en kodare med nätverksaggregering. Enheter som LiveU Solo PRO eller YoloBox Extreme kan kombinera en Wi-Fi-signal, en Ethernet-anslutning och flera 4G/5G-mobilmodem till en enda kraftfull, redundant överföringskanal. Om ett nätverk slutar fungera håller de andra strömmen igång utan att tittarna märker något.
De bästa användningsområdena
Kyrkor och andaktslokaler: Skapa en permanent strömningslösning som styrs med en enda knapp och som volontärer kan hantera utan att behöva ha IT-kunskaper.
Sport och liveevenemang: Montera en batteridriven kodare direkt på din kamerarigg för mobil, trådlös sändning från fältet.
IPTV för företag och hotell- och restaurangbranschen: Distribuera en enda kabelbox eller en digital skyltningssignal till hundratals skärmar i en byggnad via Multicast UDP.
Sammanfattning
Att köpa en HDMI-IPTV-kodare handlar om att eliminera felkällor. Genom att flytta kodningsarbetet från en vanlig dator till en dedikerad processor säkerställer du att din videoström förblir smidig, stabil och professionell, oavsett varifrån du sänder.
Visualisering av kodarinställningar
För att ge dina läsare ännu mer värde är det bra att förstå hur olika inställningar för kodaren påverkar nätverksbandbredden. Om du ställer in kvaliteten för högt för din anslutning kommer strömmen att buffras.
Här är ett interaktivt verktyg som du kan använda för att se hur ändringar av upplösning, bildfrekvens och komprimeringskodekar påverkar den slutliga bithastigheten och dataförbrukningen för en IPTV-ström.
Beräkningsverktyg för IPTV-bandbredd
| Användningsperiod | Uppskattad datamängd (GB) | Terabyte |
|---|---|---|
| 1 timme | 3,04 GB | 0,003 TB |
| 12 timmar (halvdag) | 36,45 GB | 0,036 TB |
| 24 timmar (heldag) | 72,90 GB | 0,071 TB |
| 7 dagar (vecka) | 510,30 GB | 0,498 TB |
| 30 dagar (månad) | 2 187,00 GB | 2,136 TB |
Om du vill gå igenom specifika hårdvarukrav i ditt kommande innehåll, 7 funktioner som en livestreaming-enkodare måste ha redogör för de exakta specifikationer som professionella tv- och radioaktörer prioriterar när de gör ett inköp.
 Swedish
  English (United States)
  German
  Dutch
Dutch  Danish
  English (UK)
  Norwegian