
If you recently downloaded Smart One IPTV and find yourself staring at a blank screen, you aren’t alone. It is one of the most common hurdles for new cord-cutters.
Here is the most important thing to understand right out of the gate: this application is strictly an empty media player. It does not come pre-loaded with any live channels, movies, or series. To get those, you need to link it to your own IPTV provider.
The good news? Once you get past the initial configuration, it is one of the fastest and most stable players available for smart TVs. It handles massive libraries effortlessly and doesn’t crash when loading large TV guides.
If you are wondering exactly how to setup smart one iptv, this guide will walk you through the entire process from finding your device ID to getting your channels on the screen.
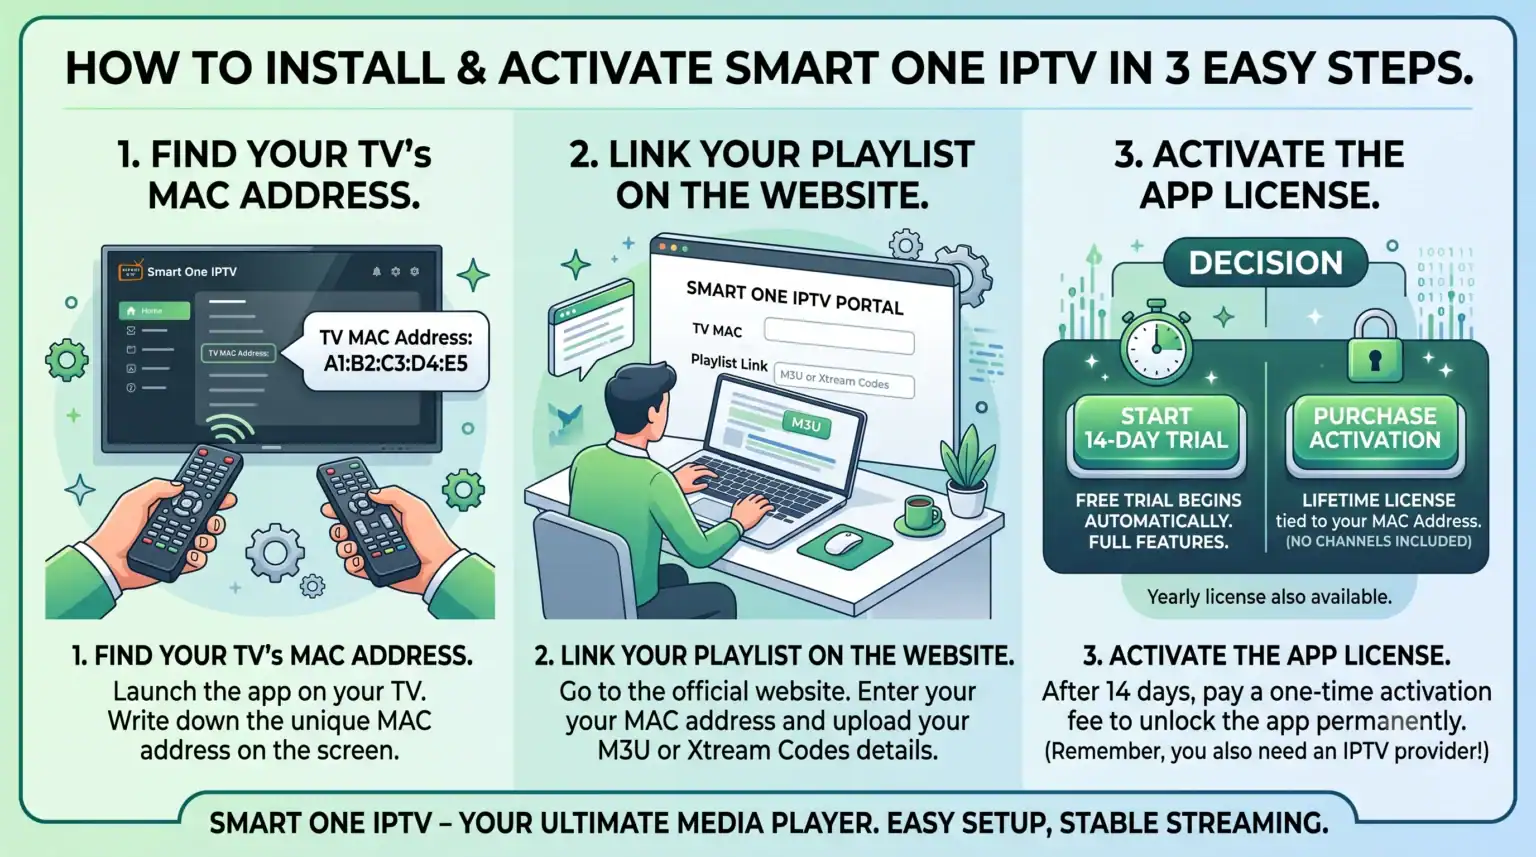
Step 1: Get Your Device Information (Smart One IPTV MAC Address Setup)
Before you can send any video feeds to your television, the developer’s server needs to know exactly which TV belongs to you. It does this using a unique hardware identifier called a MAC address.
Turn on your TV and launch the Smart One IPTV app.
On the main loading screen, you will see a string of characters labeled MAC Address (it usually looks something like a1:b2:c3:d4:e5:f6). If you don’t see it immediately, navigate to the app’s ‘Settings’ menu and look under ‘Setup’ or ‘Account’.
Write this exact code down or take a clear picture of it with your phone. You will need it for the next step.
Pro-tip: Do not confuse this with your Wi-Fi router’s MAC address. Always use the specific code displayed directly inside the app on your TV.
Step 2: The Smart One IPTV Website Upload
Now that you have your hardware ID, you need to step away from the TV. Trying to type long, complicated server URLs using a television remote is a nightmare, so the developers built a web portal to handle it for you.
Grab your phone or sit down at your computer and follow these steps:
Open your web browser and go to the official portal: smartone-iptv.com.
Navigate to the section to manage or upload your playlist. Look for the field asking for your TV MAC and type in the code you wrote down in Step 1 exactly as it appeared.
Choose your upload method. Most premium providers will give you an M3U Link or an Xtream Codes API login. (Xtream Codes is generally preferred because it updates faster, but both work perfectly).
Give your playlist a name so you can recognize it (e.g., “Main Channels”) and paste your provider’s link or login credentials into the appropriate boxes.
Hit the button to save or upload your list.
Step 3: Refresh and Watch
With the smart one iptv website upload complete, the server now has your provider’s channel list and knows exactly where to send it.
Head back to your living room. If the app is still open on your TV, you need to force close it and restart it, or simply hit the ‘Reload’ or ‘Refresh’ option in the main menu.
Depending on the size of your provider’s library, it might take a minute or two to download all the categories. Once it finishes, your live TV, VODs, and TV series should be neatly organized and ready to play.
(Note: Smart One gives you a 15-day free trial to test everything out. Once that expires, you will need to pay a small one-time or yearly activation fee on their website to keep using the player.)
Need a Playlist to Test Your New Setup?
A great media player is useless without a solid backend connection. If you have finished the setup but your channels are constantly buffering, missing logos, or throwing “failed to load” errors, the issue is almost certainly your current provider’s servers.
Check out our recommended premium M3U links to experience what a truly buffer-free, 4K streaming setup looks like.
 English (UK)
  English (United States)
  German
  Dutch
Dutch  Danish
  Norwegian
  Swedish